Thursday, April 30, 2020

Oracle Cloud Infrastructure 2019 Certified Architect Associate

        Passed the Oracle Cloud Infrastructure 2019 Certified Architect Associate in this Holy month by God's grace. Thanks to #Oracle, I will even try to complete a few more Oracle certifications next month.

       Shared my knowledge and experience about how I prepared for the exam with a couple of my friends, which was helpful for them to attend and pass the exam too.


I wish Good luck to guys who are preparing for Oracle Certifications!

Tuesday, March 31, 2020

AHF-00014: AHF Location is not owned by root in directory hierarchy


Download Autonomous Health Framework (AHF) - Including TFA and ORAchk/EXAChk (Doc ID 2550798.1). To check the previous TFA version 18.3 install you can follow here.

Got the below error when trying to install Autonomous Health Framework (AHF) version 19.3.2.0.0.

[ERROR] : AHF-00014: AHF Location /usr/tfa is not owned by root in directory hierarchy

Create a directory under /usr as <tfa> owned as root user and follow the below steps for a clean and successful install of AHF.

[root@sajidserver tfa]# ./ahf_setup -local

AHF Installer for Platform Linux Architecture x86_64

AHF Installation Log : /tmp/ahf_install_753_2020_03_01-16_12_12.log

Starting Autonomous Health Framework (AHF) Installation

AHF Version: 193200 Build Date: 201911251652

TFA is already installed at : /usr/tfa/tfa_home

Installed TFA Version : 192200 Build ID : 2019092614532

Default AHF Location : /usr/tfa

Do you want to change AHF Location (/usr/tfa) ? Y|[N] : Y

Please Enter new AHF Location : /usr/tfa

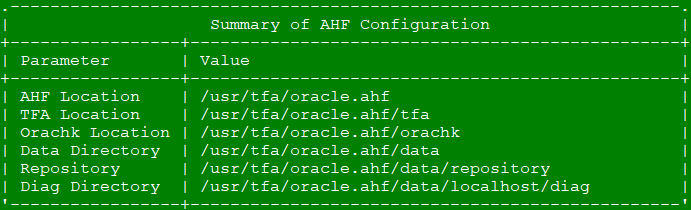
AHF Location : /usr/tfa/oracle.ahf

AHF Data Directory stores diagnostic collections and metadata.
AHF Data Directory requires at least 5GB (Recommended 10GB) of free space.

Choose Data Directory from below options :

1. /usr/tfa/oracle.ahf [Free Space : 73569 MB]
2. /usr [Free Space : 73569 MB]
3. Enter a different Location

Choose Option [1 - 3] : 1

AHF Data Directory : /usr/tfa/oracle.ahf/data

orachk scheduler is already running at : usr/tfa/tfa_home/ext/orachk

Installed orachk version : ORACHK  VERSION: 19.2.0_20190717

Stopping orachk scheduler

Copying orachk configuration from /usr/tfa/tfa_home/ext/orachk

Shutting down TFA : /usr/tfa/tfa_home

Copying TFA Data Files from /usr/tfa/tfa_home

Uninstalling TFA : /usr/tfa/tfa_home

Do you want to add AHF Notification Email IDs ? [Y]|N : N

Extracting AHF to /usr/tfa/oracle.ahf

Configuring TFA Services

Copying TFA Data Files to AHF

Configuring TFA Services

Copying TFA Data Files to AHF

Discovering Nodes and Oracle Resources

Starting TFA Services


Running TFA Inventory...

Adding default users to TFA Access list...


Retrieving legacy orachk wallet details ...
Storing orachk wallet details into AHF config/wallet ...

Starting orachk daemon from AHF ...

AHF binaries are available in /usr/tfa/oracle.ahf/bin

AHF is successfully installed

Moving /tmp/ahf_install_35943_2020_03_01-16_12_12.log to /usr/tfa/oracle.ahf/data/diag/ahf/

Done with the installation. Happy Log Collection.

Saturday, February 29, 2020

How to collect Hanganalyze and Systemstate dump

Oracle easily handles DML locks. There will be a certain situation when the database will be in the hung mode and at that particular time to detect the proper blocking and waiting for sessions. Oracle has provided with Hanganalyze utility which will help in collecting Lite Onboard Monitor (LTOM) across the server, which will provide detailed information about network, disks, RAM and CPU.

Oracle support usually asks to collect Hanganalyze and Systemstat dump from the system. Both Hanganalyze and Systemstate dump can be collected using SQL* plus utility. Rather than giving more theoretical knowledge, I will keep it more practical. It will help you to understand how to collect it both across RAC and standalone databases.

Check the screenshot below for the level and description of Hanganalyze.


To generate it across RAC, detailed step by step.

SQL> oradebug setmypid;
Statement processed.
SQL> oradebug unlimit;
Statement processed.
SQL> oradebug setinst all;
Statement processed.
SQL> oradebug -g all dump systemstate 258;
Statement processed.
SQL>oradebug all hanganalyze 4;
Hang Analysis in /usr/rdbms/test/test1/trace/test1_ora_43219.trc
SQL>oradebug tracefile_name;
/usr/rdbms/test/test1/trace/test1_ora_43219.trc
SQL>exit


To generate it on standalone database, detailed step by step.

SQL>oradebug setmypid;
Statement processed.
SQL>oradebug unlimit;
Statement processed.
SQL>oradebug hanganalyze 4;
Hang Analysis in /usr/rdbms/test/test1/trace/test1_ora_56429.trc
SQL>exit

SQL>oradebug setmypid;
Statement processed.
SQL>oradebug dump systemstate 258;
Statement processed.
SQL>oradebug tracefile_name;
/usr/rdbms/test/test1/trace/test1_ora_56623.trc
SQL>exit

Remmember it will generate huge trace files. Certain scenarious you will not be able to invoke SQL* plus, at that time you need to connect with sqlplus -prelim. Happy Troubleshooting!.

Sunday, December 1, 2019

GRANT ALL in Amazon RDS for MySQL

I was working on creating a user in MySQL database hosted on Amazon Relational Database Service (RDS) – AWS. Happen to run into an issue when granting privileges to the MySQL user, which was never an issue earlier. But that's okay, as long we have the fix.

mysql> CREATE USER 'sajid'@'%' IDENTIFIED BY 'sajid';
Query OK, 0 rows affected (0.00 sec)

mysql> GRANT ALL ON *.* TO 'sajid'@'%';
ERROR 1045 (28000): Access denied for user 'sajid'@'%' (using password: YES)

But the above command works perfectly as expected, without any errors in on-premise servers. I have tried different ways, but the below fix works, rather than *.*. It has to be percent sign enclosed in the backquote as below.

mysql> GRANT ALL ON `%`.* TO sajid@`%`;
Query OK, 0 rows affected (0.00 sec)

Friday, November 1, 2019

OEM Agent Timezone Change


On November 3, 2019 daylight saving time ends. If you are an on-call DBA, your phone will be going fiasco late at night with all the OEM alerts triggering at once. Keep the commands handy which will get you some sleep. Here I will be changing the timezone to America/New_York from a different timezone, you can edit it as per your environmental setup.

[oracle@sajidserver]$ Set the agent bash profile
[oracle@sajidserver]$ more /usr../config/emd.properties|grep agentTZRegion
agentTZRegion=US/Pacific
[oracle@sajidserver]$ emctl stop agent
[oracle@sajidserver]$ export TZ=America/New_York
[oracle@sajidserver]$ emctl resetTZ agent

It will give a detailed output, about what the next steps that need to be executed and from the OEM repository database.


[oracle@sajidserver]$ emctl start agent
[oracle@sajidserver]$ emctl upload agent
[oracle@sajidserver]$ emctl status agent

[oracle@sajidserver]$ more /usr../config/emd.properties|grep agentTZRegion
agentTZRegion=America/New_York

Now login into the OEM Repository database.

SYS>alter session set container=SAJID_PDB;
Session altered.

SYS>alter session set current_schema = SYSMAN;
Session altered.

SYS>exec mgmt_target.set_agent_tzrgn('<Hostname>:3872','America/New_York');
PL/SQL procedure successfully completed.

SYS>commit;
Commit complete.

Check the Timezone now in OEM Repository Database it might have been reflected.

SYS>select target_name, timezone_region from sysman.mgmt_targets where target_name='<Hostname>:3872';

TARGET_NAME        TIMEZONE_REGION
-----------        ---------------
<Hostname>:3872    America/New_York

Hopefully OEM alerts should get subsided after this :).


Wednesday, October 2, 2019

OEM Agent Diagnose for Status Pending (Post Blackout)

Sometimes OEM agents will be in status pending status, after ending the blackouts related to maintenance (operating system, Networking, Database, Application). One of my colleagues calls it out as Wonky state. The steps you need to perform to bring it in a green and clean state to start monitoring your databases are as below.


[oracle@sajidserver emd]$ emctl stop agent
[oracle@sajidserver emd]$ cd $AGENT_HOME/sysman/emd
[oracle@sajidserver emd]$ rm -rf state/*
[oracle@sajidserver emd]$ rm -rf upload/*
[oracle@sajidserver emd]$ rm -rf collection/*
[oracle@sajidserver emd]$ rm agntstmp.txt
[oracle@sajidserver emd]$ rm blackouts.xml
[oracle@sajidserver emd]$ emctl clearstate agent
[oracle@sajidserver emd]$ emctl start agent

You can see agents starts normally, but emctl status agents spit out the below error with proper reasoning.


[oracle@sajidserver emd]$ emctl status agent
Blocked Reason: Agent is out-of-sync with repository. This most likely means that the agent was reinstalled or recovered. Please contact an EM administrator to unblock the agent by performing an agent resync from the console.

And even emctl upload agent fails:

[oracle@sajidserver emd]$ emctl upload agent
Oracle Enterprise Manager Cloud Control 13c Release 2
Copyright (c) 1996, 2016 Oracle Corporation.  All rights reserved.
---------------------------------------------------------------
EMD upload error: full upload has failed: The agent is blocked by the OMS. Agent is out-of-sync with repository. This most likely means that the agent was reinstalled or recovered. Please contact an EM administrator to unblock the agent by performing an agent resync from the console. (AGENT_BLOCKED)

Now drill down into the specific target as below and hit Resynchronization. After that follow the screen with unblocking the agent and submitting a confirmation job as below screens.


Give it a few minutes, then your agent will appear in up and green status as below.


Happy Monitoring :).


Monday, August 19, 2019

ERROR 1238 (HY000): Variable is a read only variable in MySQL Database


Few times when we want to increase the performance of MySQL database, by tweaking certain MySQL variables as suggested by MySQL documentation. We sometimes notice we are not able to make the proper modification with some errors. It's good to have a prevailing knowledge about which parameters can be changed dynamically and for those not, can align with different team to get downtime.

You can refer to https://dev.mysql.com/doc/refman/5.7/en/innodb-parameters.html, about the parameters that can be changed dynamically for version pertaining to MySQL database version 5.7.

Error:

mysql> set global innodb_open_files=600;
ERROR 1238 (HY000): Variable 'innodb_open_files' is a read only variable

Fix:

1. Edit the changes related to the parameter in my.cnf file, at the operating system level.
2. Bounce MySQL services. So that changes are persistent.

Monday, July 29, 2019

Install MySQL Enterprise Monitor step by step with screenshots

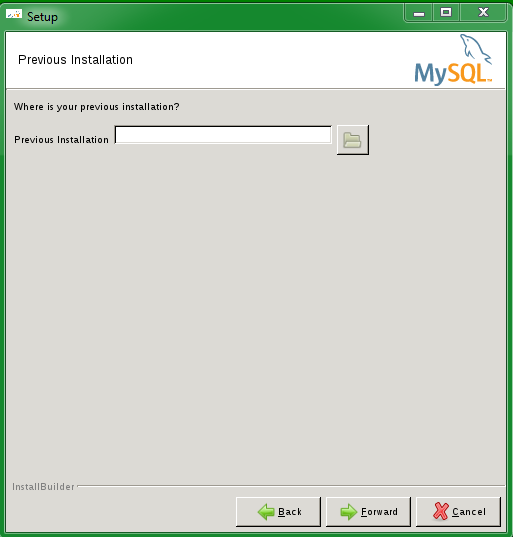
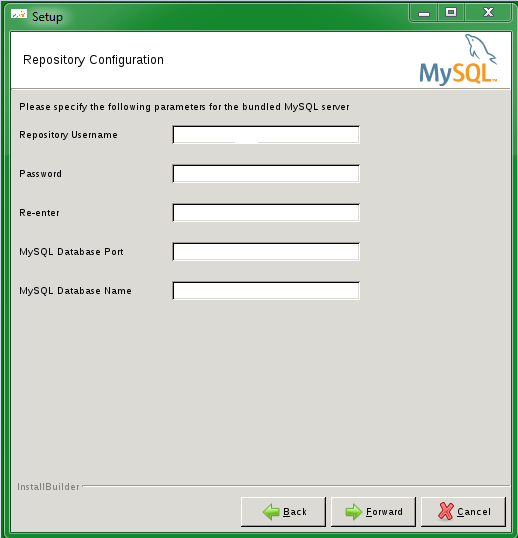
In this post will cover the step by step screenshots to install MySQL Enterprise Monitor (MEM) version 8.0.3, which will help us for troubleshooting and notifying any critical issues related to MySQL databases.

Download the latest software related to MySQL Enterprise Monitor (MEM) version 8.0.3 from Oracle Support site. You can install  MySQL Enterprise Monitor (MEM) using three ways:

1. Graphical User Interface (GUI)
2. Text-based
3. Unattended 

MySQL Enterprise Monitor 8.0.3 now supports MySQL 8, MySQL  Enterprise Monitor Agent, Data collection model, Graphs, Advisors and Query Analyzer have been updated, which will help to triage any MySQL issues more easily. Before the installation starts, have proper ports and firewalls ready for Tomcat server port, Tomcat SSL port and MySQL Database Port.

I have chosen the Graphical User Interface (GUI) and below are the step by step screenshots for the installation process.


At this stage, we are done with the installation of the MySQL Enterprise Monitor. Happy Monitoring!!!

Sunday, March 31, 2019

Step by Step Oracle 18c Database Installation on Linux with Screenshots


Create a staging directory on your server and download the files from OTN. Make sure to set the profiles perfectly for the database and you do have all the directories set with right permissions. Check the RPM’s based on your operating system stipulations. In this scenario, we will see how to install 18.0.0.0.0 on OEL 7. Lets get started.


[Sajid@SajidServer~]$ cd /usr/stage
[Sajid@SajidServer stage]$ ls -ltr
-rwxrwxr-x  1 oracle oinstall 4564649047 Jan 23 16:16 LINUX.X64_180000_db_home.zip

[Sajid@SajidServer stage]$ unzip LINUX.X64_180000_db_home.zip

Make sure you have your VNC or XMING set up properly and now invoke the runInstaller

[Sajid@SajidServer database]$ ./runInstaller


At this stage, we have successfully completed the 18c database install on OEL7. Thanks for Visiting!!!