Thursday, September 24, 2015

Oracle 12c Linux client 64 bit step by step install (12.1.0.2)


Create a staging directory on your application server and download the files from OTN. Make sure to set the profiles perfectly for the database and you do have all the directories set with right permissions. Check the RPM’s based on you operating system stipulations.

You can install client based on your requirements below are the install types and space requirements.


Once you log on to the machine

[Sajid@Sajid Server stage]$ ls
linuxamd64_12102_client.zip
[Sajid@Sajid Server stage]$ unzip linuxamd64_12102_client.zip 
[Sajid@Sajid Server stage]$ ls
client
[Sajid@Sajid Server client]$ ls
-rwxrwxr-x  1 oracle oinstall  500 Feb  6  2013 welcome.html
-rwxr-xr-x  1 oracle oinstall 8537 Jul  7  2014 runInstaller
drwxr-xr-x  4 oracle oinstall 4096 Jul  7  2014 install
drwxrwxr-x  2 oracle oinstall 4096 Jul  7  2014 response
drwxr-xr-x 14 oracle oinstall 4096 Jul  7  2014 stage


Select the install method and hit next. Most of the shops opt for Administrator, you can even proceedwith instant client and runtime. If you like to add some custom parameters you need to choose custom as of now I am choosing Adminitrator.


Select language and hit Next


Select appropriate Oracle base and Software location and hit next


Save the response file in case you would like to do silent install for any other fresh installs.


Your client is installed successfully. Update your tnsnames.ora file and test your database connection.

sqlplus username/password@<Server Name>/<DB Name>


The above screen will pop up when you do custom install all the rest of the steps are pretty much similar to Administrator but her you can choose any components based on your requirement.


Tuesday, September 22, 2015

Step by Step Oracle 12c Database Installation with Screenshots (12.1.0.2)

Create a staging directory on your server and download the files from OTN. Make sure to set the profiles perfectly for the database and you do have all the directories set with right permissions. Check the RPM’s based on you operating system stipulations.
p17694377_121020_Linux-x86-64_1of8.zip
p17694377_121020_Linux-x86-64_2of8.zip

[Sajid@SajidServer~]$ cd /u01/stage
[Sajid@SajidServer stage]$ ls -ltr
-rwxrwxr-x 1 oracle oinstall 1673517582 Sep 01 17:04 p17694377_121020_Linux-x86-64_1of8.zip
-rwxrwxr-x 1 oracle oinstall 1014527110 Sep 01 17:04 p17694377_121020_Linux-x86-64_2of8.zip
[Sajid@SajidServer stage]$ unzip p17694377_121020_Linux-x86-64_1of8.zip
[Sajid@SajidServer stage]$ unzip p17694377_121020_Linux-x86-64_2of8.zip
[Sajid@SajidServer stage]$ ls -ltr
-rwxrwxr-x 1 oracle oinstall 1673517582 Sep 01 17:04 p17694377_121020_Linux-x86-64_1of8.zip
-rwxrwxr-x 1 oracle oinstall 1014527110 Sep 01 17:04 p17694377_121020_Linux-x86-64_2of8.zip
drwxrwxr-x 7 oracle oinstall       4096 Jul 01  2014 database
[Sajid@SajidServer stage]$ cd database

Make sure you have your VNC or XMING set up properly and now invoke the runInstaller

[Sajid@SajidServer database]$ ./runInstaller


Untick the box I wish to receive security updates via My Oracle Support

Select Yes and hit Next

Select Install Database Software only

Select Single Instance database installation


Select the language and Hit Next

Select database edition and hit Next

Set the Oracle Base and Software Location as per your shop

Select the group as Oinstall. Look for the Prerequisite check and look for if you want to set at this time and hit next. At this point you will be done with the Software Installation.
Invoke dbca from your server and if the profiles are set properly it will take you to the next screen.

Select Create Database and hit Next


Select Advanced Mode and hit next. You can even go with Create database with default settings depending on your requirement.


Select General Purpose or Transactional Processing and hit Next

Enter the Global Database Name and SID. Check the Create As Container Database and select create a container database with one or more PDBs and enter the PDB name. You can make changes depending upon your requirements and hit Next.


You can Configure Enterprise Manager (EM) Database Express based on your needs and hit Next

You can choose separate passwords or use same passwords and hit Next

Select the Listener Name and Listener Port as per your requirements and hit Next

You can Enable Archiving and even specify Fast Recovery Area based on your prerequisites and hit Next

On Location give the path of your archive log location if you are willing to and hit Ok

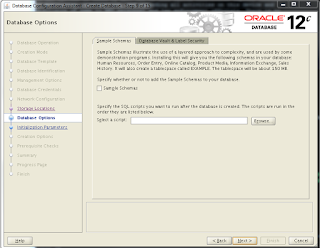
You can select sample schemas if not even leave it and hit Next

Set the Memory values based on you specifications after it in the same window select Sizing

Enter the process and hit Character Set

Choose the options on stipulation and hit Connection Mode

Choose an option and now hit Next

Now you can Create Database and even save the template with database creation scripts. Select Customize Storage Settings.


Set the location for Control File and hit Apply


Select Datafiles and hit Apply

Set the Redo logs properly and hit Apply and now hit Next


You can check the Activity log and Alert log for errors


Now your Database is Created.


Tuesday, September 8, 2015

12c User connection ORA-01017 Bug

SYS@Sajid>connect <username>/<password>
ERROR:
ORA-01017: invalid username/password; logon denied
Warning: You are no longer connected to ORACLE.

@>exit

[oracle@Sajidserver01] /home/oracle: sqlplus  as sysdba

SQL*Plus: Release 12.1.0.2.0 Production on Thu Sep 3 11:42:00 2015

Copyright (c) 1982, 2014, Oracle.  All rights reserved.


Connected to:
Oracle Database 12c Enterprise Edition Release 12.1.0.2.0 - 64bit Production
With the Partitioning, Real Application Clusters, Automatic Storage Management, OLAP,
Advanced Analytics and Real Application Testing options

####################
Proper Connect String
####################

SYS@Sajid>connect <username>/<password>@<dbname>;
Connected.
<user>@<dbaname>>show user;
USER is "username"

12c ASMSNMP user creation in RAC

You need ASMSNMP user to configure the targets in Grid Control Monitoring. Below are the step by step creation of ASMSNMP user creation in 12c in RAC.

#########################
Check for the ASMSNMP user
#########################

[grid@Sajidserver01 ~]$ asmcmd

ASMCMD> lspwusr
Username sysdba sysoper sysasm
     SYS   TRUE    TRUE  FALSE


[grid@Sajidserver01 ~]$ sqlplus /as sysasm

SQL*Plus: Release 12.1.0.2.0 Production on Tue Sep 8 10:04:41 2015

Copyright (c) 1982, 2014, Oracle.  All rights reserved.


Connected to:
Oracle Database 12c Enterprise Edition Release 12.1.0.2.0 - 64bit Production
With the Real Application Clusters and Automatic Storage Management options

SYS@+ASM1>select * from v$pwfile_users;

USERNAME                       SYSDB SYSOP SYSAS SYSBA SYSDG SYSKM     CON_ID
------------------------------ ----- ----- ----- ----- ----- ----- ----------
SYS                            TRUE  TRUE  FALSE FALSE FALSE FALSE          0


#############################
Create pwd file in grid home
#############################
[grid@Sajidserver01 ~]$ cd $ORACLE_HOME/dbs
{grid@Sajidserver01 dbs]$ pwd
/usr/app/12.1.0/grid/dbs
[grid@Sajidserver01 dbs]$ ls -ltr

[grid@Sajidserver01 dbs]$ orapwd file=/usr/app/12.1.0/grid/dbs/orapw+ASM password=<ur pwd>

[grid@Sajidserver01 dbs]$ ls -ltr

-rw-r----- 1 grid oinstall   7680 Sep  8 10:09 orapw+ASM


##############################################################################

Note the points on pwd file management in ASM

If there are two nodes with +ASM1 running on node 1 and +ASM2 running on node2.

— Pre 11gR2 —
Password file on Node1: orapw+ASM1
Password file on Node2: orapw+ASM2

— 12cR2 or Post 11gR2 —
Password file on Node1: orapw+ASM
Password file on Node2: orapw+ASM

###############################################################################

Copy the file across the nodes (As configured in cluster)

[grid@Sajidserver01 dbs]$ scp orapw+ASM Sajidserver02:/usr/app/12.1.0/grid/dbs/

orapw+ASM                                                                                                                  100% 7680     7.5KB/s   00:00

[grid@Sajidserver01 dbs]$ sqlplus / as sysasm

SQL*Plus: Release 12.1.0.2.0 Production on Tue Sep 8 10:11:55 2015

Copyright (c) 1982, 2014, Oracle.  All rights reserved.


Connected to:
Oracle Database 12c Enterprise Edition Release 12.1.0.2.0 - 64bit Production
With the Real Application Clusters and Automatic Storage Management options

SYS@+ASM1>create user asmsnmp identified by <ur pwd>;

User created.

SYS@+ASM1>grant sysdba to asmsnmp;

Grant succeeded.

SYS@+ASM1>select * from v$pwfile_users;

USERNAME                       SYSDB SYSOP SYSAS SYSBA SYSDG SYSKM     CON_ID
------------------------------ ----- ----- ----- ----- ----- ----- ----------
SYS                            TRUE  TRUE  FALSE FALSE FALSE FALSE          0
ASMSNMP                        TRUE  FALSE FALSE FALSE FALSE FALSE          0

SYS@+ASM1>show parameter pass;

NAME                                 TYPE        VALUE
------------------------------------ ----------- ------------------------------
remote_login_passwordfile            string      EXCLUSIVE

[grid@Sajidserver01 dbs]$ asmcmd

ASMCMD> lspwusr
Username sysdba sysoper sysasm
     SYS   TRUE    TRUE  FALSE
 ASMSNMP   TRUE   FALSE  FALSE

#######################
Check You Connection
#######################

[grid@Sajidserver01 dbs]$ sqlplus asmsnmp as sysdba

SQL*Plus: Release 12.1.0.2.0 Production on Tue Sep 8 10:13:49 2015

Copyright (c) 1982, 2014, Oracle.  All rights reserved.

Enter password:

Connected to:
Oracle Database 12c Enterprise Edition Release 12.1.0.2.0 - 64bit Production
With the Real Application Clusters and Automatic Storage Management options