Create a staging directory on your server and download the
files from OTN. Make sure to set the profiles perfectly for the database and
you do have all the directories set with right permissions. Check the RPM’s
based on you operating system stipulations.
p17694377_121020_Linux-x86-64_1of8.zip
p17694377_121020_Linux-x86-64_2of8.zip
[Sajid@SajidServer~]$
cd /u01/stage
[Sajid@SajidServer
stage]$ ls -ltr
-rwxrwxr-x 1 oracle
oinstall 1673517582 Sep 01 17:04 p17694377_121020_Linux-x86-64_1of8.zip
-rwxrwxr-x 1 oracle
oinstall 1014527110 Sep 01 17:04 p17694377_121020_Linux-x86-64_2of8.zip
[Sajid@SajidServer
stage]$ unzip p17694377_121020_Linux-x86-64_1of8.zip
[Sajid@SajidServer
stage]$ unzip p17694377_121020_Linux-x86-64_2of8.zip
[Sajid@SajidServer
stage]$ ls -ltr
-rwxrwxr-x 1 oracle
oinstall 1673517582 Sep 01 17:04 p17694377_121020_Linux-x86-64_1of8.zip
-rwxrwxr-x 1 oracle
oinstall 1014527110 Sep 01 17:04 p17694377_121020_Linux-x86-64_2of8.zip
drwxrwxr-x 7 oracle
oinstall 4096 Jul 01 2014 database
[Sajid@SajidServer
stage]$ cd database
Make sure you have your
VNC or XMING set up properly and now invoke the runInstaller
[Sajid@SajidServer
database]$ ./runInstaller
Untick the box I wish to receive security updates via My
Oracle Support
Select Yes and hit Next
Select Install Database Software only
Select Single Instance database installation
Select the language and Hit Next
Select database edition and hit Next
Set the Oracle Base and Software Location as per your shop
Select the group as Oinstall. Look for the Prerequisite
check and look for if you want to set at this time and hit next. At this point
you will be done with the Software Installation.
Invoke dbca from your server and if the profiles are set
properly it will take you to the next screen.
Select Create Database and hit Next
Select Advanced Mode and hit next. You can even go with
Create database with default settings depending on your requirement.
Select General Purpose or Transactional Processing and hit
Next
Enter the Global Database Name and SID. Check the Create As
Container Database and select create a container database with one or more PDBs
and enter the PDB name. You can make changes depending upon your requirements
and hit Next.
You can Configure Enterprise Manager (EM) Database Express
based on your needs and hit Next
You can choose separate passwords or use same passwords and
hit Next
Select the Listener Name and Listener Port as per your
requirements and hit Next
You can Enable Archiving and even specify Fast Recovery Area
based on your prerequisites and hit Next
On Location give the path of your archive log location if
you are willing to and hit Ok
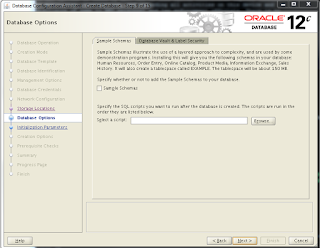
You can select sample schemas if not even leave it and hit
Next
Set the Memory values based on you specifications after it
in the same window select Sizing
Enter the process and hit Character Set
Choose the options on stipulation and hit Connection Mode
Choose an option and now hit Next
Now you can Create Database and even save the template with
database creation scripts. Select Customize Storage Settings.
Set the location for Control File and hit Apply
Select Datafiles and hit Apply
Set the Redo logs properly and hit Apply and now hit Next
You can check the Activity log and Alert log for errors
Now your Database is Created.


Hi, nice guide, Where did you find p17694377_121020_Linux-x86-64_1of8.zip from? I'm searching in my oracle support for release 12c R2 but not sure how you concluded the number "P17694377" was correct and how you went through downloading it.
ReplyDeletethanks